
According to Statista more than 273 million American shoppers will purchase online by 2025. As of 2022 WooCommerce is the leading eCommerce platform with 23% of the global market share. Simply put WooCommerce is very popular and well used. If you’re considering using WooCommerce with Stripe then this guide is right for you.
In this guide we’ll cover important factors before you start accepting Stripe on your online store.
Table of Contents
Before We Start Let’s Confirm WooCommerce is Properly Installed!
 First make sure that WooCommerce is properly installed on your website. A quick way to confirm this is to log into your website’s WordPress dashboard. If you don’t remember, your website dashboard link will look something like https://YourWebsite.com/wp-admin/.
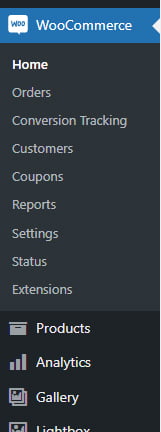
Once you’re in the dashboard then you’ll see a list of links on the left hand side navigation bar. Look for a link titled “WooCommerce”. This will confirm that WooCommerce is already installed on your website and ready to use.
Why Businesses Use Stripe
Stripe is well known but let’s briefly cover it. Stripe API which is used by the plugin allows a WooCommerce store to to accept credit cards directly on the website using an API. An API is basically a piece of code that connects two systems. In this case it connects your WooCommerce Store to your Stripe Account. Stripe has no setup fees, no monthly fees or hidden costs. This is why it’s widely used in over 40 countries. Stripe is also PCI-DSS compliant which means that they follow the guidance from PCI Security Standards to help protect your card and keep it secure throughout the credit card verification process.
Let’s Integrate Stripe with WordPress
While there are lots of plugins available the most popular and widely used plugin to accept credit cards through Stripe is the WooCommerce with Stripe plugin.
There are two ways to setup this plugin on your website store.
Option 1: Install it from your WordPress Plugins page
The easiest method is to log into your website’s WordPress Dashboard –> then click on the link on the left for “Plugins” –> Search for “WooCommerce Stripe“. It will show you a list of plugins. Look for a plugin named “WooCommerce Stripe Payment Gateway” by WooCommerce. There’s an option for “More Details” and an “Install Now” button.

Click on the “Install Now” button and it will start downloading and then installing the plugin. Once it’s finished installing then the button will change to show “Activate” so that you can click on activate and start using the plugin.
Option 2: Download The Plugin From WooCommerce.com
You can download this plugin directly by going to Woocommerce.com –> then click on the navigation link at the top for “Extensions“. You should now be on the products page which shows a search area. Type in “stripe” and the very first option in the dropdown will be the Stripe Extension.
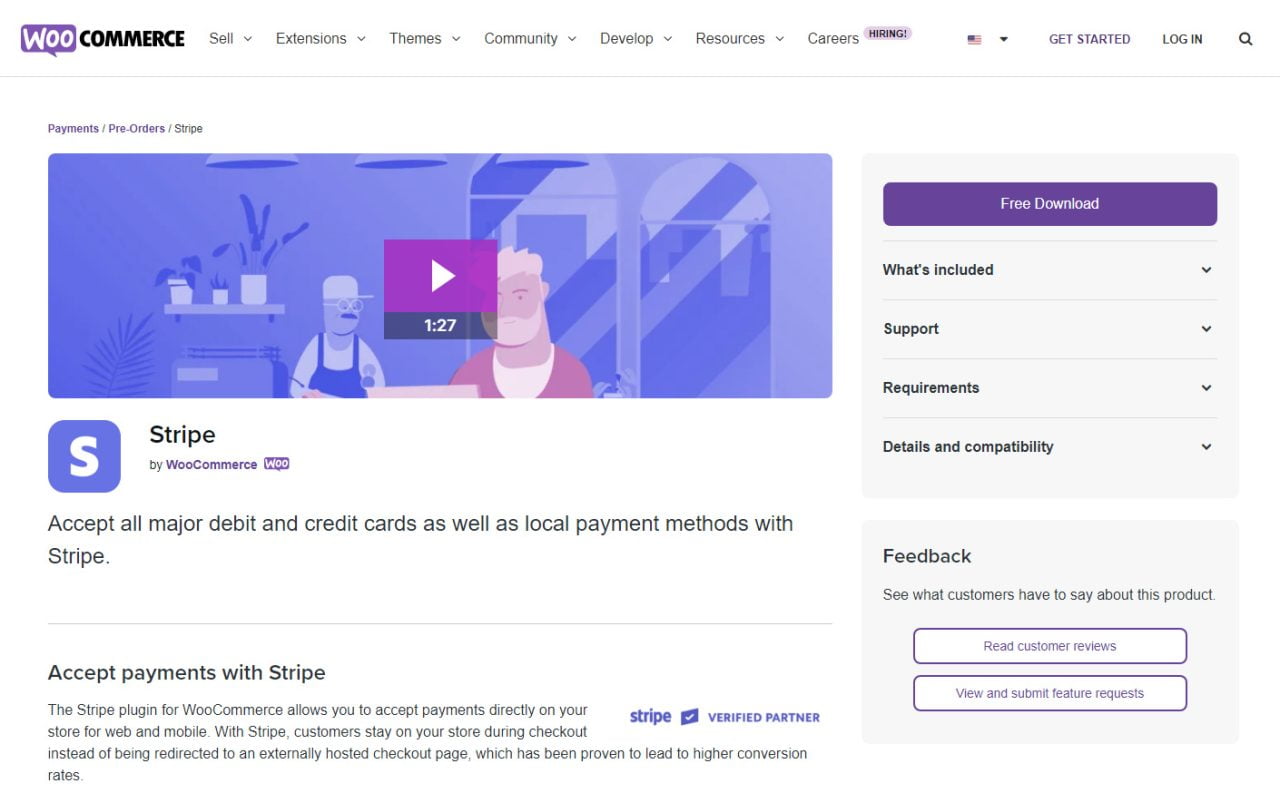
Click on that link and it will show you the full details for the plugin such as what’s included, support, requirements, details and compatibility. You’ll also see a button for “Free Download” that will let you download it.
Once you’ve downloaded it then log into your website’s WordPress dashboard. On the left hand side navigation bar scroll down to click on “Plugins”.
The Plugins page you’ll see a button for “Add New”. Click on the “Add New” button then on the following page next to “Add Plugins” click on “Upload Plugin” which will expand to show you an area for uploading the Stripe plugin. Just click “Choose File” and it will let you navigate on your computer to the location where you downloaded the plugin so that it will upload it.
Make sure to allow your website at least a few seconds to finish uploading your plugin depending on your internet speed. Once you’ve installed the plugin then go to the left hand sidebar navigation of your dashboard and click on “Plugins“. On the right hand side you’ll see links for Active, Inactive, Update.
Click on the “Active” tab link to confirm that the plugin named “WooCommerce Stripe Gateway” is visible in this tab.
If it’s NOT in the “Active” tab then click on the “Inactive” link and see if you see it there. If it is located there then click on the “Activate” link for the WooCommerce Stripe Gateway.
If you don’t see the plugin in Active or Inactive tab then you may have to try installing it. Instead of downloading the plugin you could try installing it directly from the plugins page. If this still doesn’t work then you may have to contact a WordPress WooCommerce expert and see if they can help you.
Lets Configure Stripe for WooCommerce Plugin
Before we can start using this plugin we need to first create a Stripe account. You can register for a free Stripe account at https://dashboard.stripe.com/register. The registration process is simple. Make sure to have your store information ready during the registration process.
Once you’ve registered for a Stripe account and your account is approved then log into Stripe.
Once you’re logged into Stripe then you’ll be directed to your Stripe Dashboard. On the right hand side you’ll see a link for “Developers” which you’ll need to click on.

When you’re on the developers page then on the left hand side you’ll see links for Developers such as “Overview”, “API Keys”, “Webhooks”, “Events”, “Logs” and “Apps”. Click on “API Keys”.
Generate Stripe API Keys (Test Key & Live Key)
Now it’s time to generate a key that will let your website connect to your stripe account. We’ll generate a test key and a live key. The test key will allow us to use demo credit card information to buy a product directly on the website without using your credit card. This is important because you don’t want to use your own credit card while testing out the website unless you’re sure it’s working correctly.
On the right hand side of the “API Keys” section you’ll see a slide button for “View Test Data”. If it’s gray then that means it’s off. Click on this button. On this page there should be a Publish Key which starts with “pk_test_……”. You can click on that key and it will copy it. Once it’s copied then paste it in your notes. Next click on the “Reveal test key” which will reveal the secret key. The test Secret key will start with “sk_test_…….”. Click on it to copy it and then paste it in your notes. You should now have a test public key and a test secret key (the secret key is also known as private key).
If you don’t see a test key then click on the “Create secret key” and it will create a test public and secret key for you.
Let’s head back to live data by clicking on the “Viewing test Data” button.
If there is no key on this page then click on the “Create secret key”. It will create a LIVE publishable key and secret key. Click on the publishable live key to copy it, then copy the secret live key.
You should now have public private key for test and another public private key for testing. Leave this tab open because you’ll need this for your webhook.
Let’s Integrate The Stripe Keys Into Your Store
Open a new browser tab and log into your website’s WordPress dashboard. Then on the left hand side click on “WooCommerce” –> then click on “Settings”. On the “Settings” on the right hand side you’ll see multiple tabs. Look for a tab labeled “Payments” and click on it.
On the “Payments” tab you’ll notice now that there are a lot of Stripe payment options showing up. For this guide we’ll start with the most basic which is labeled “Stripe – Credit Card”. On the same row you’ll see a grey button that displays whether it’s enabled or not. Click on it and it will change the status button to a purple color signaling that it’s on.
Now on the same row click on the button for “Manage”. It will show you the “Payment Methods” and “Settings” link. By default the Payment Methods tab is selected. In this case it will show Credit Card / Debit Card. It will also allow you to provide customers to use their favorite express methods such as Apple Pay, Google Pay. Click on the “Save Changes” and it will save your changes.
Click on the “Settings” next to “Payment Methods”. The setting page has several options. The “Name” label will show “Credit Card” which we can leave as is. The “Description” label shows “Pay with your credit card via Stripe.” You can change this if needed but I usually just leave it as is.
There’s also a checkbox for “Enable test mode” which allows you to turn on “Test Mode” for Stripe directly on your website. Click on the “Edit account keys” and this will let you enter the LIVE and TEST key in this section. Leave this option checked so that we can test the shopping cart and checkout process. Further down I’ll show you how you can use different demo credit card numbers.
NOTE: When you’re adding in the keys then it will show you “webhook endpoint” which will be something like https://yourwebsite.com/?wc-api=wc_stripe. Copy that webhook and return to the other open tab for Stripe. If you’re on the “Developers” page then on the left hand side click on “Webhooks” and it will give you an option to paste the webhook and save this setting. Now head back to your other tab for WordPress.
Go ahead and finish entering your keys and then save both the public and private keys.
Scroll further down and you’ll see “Account Details”. It should show that Payments is Enabled. Payouts is Enabled. It will show you the status of the webhook.
Scroll further and you’ll see “Payments & transactions”. By default the “Enable payments via saved cards” will be checked. As noted below it, these credit card numbers are NOT stored on your website but directly on Stripe. Depending on your store you can leave it checked or uncheck it.
Next there’s an option for “Enable separate credit card form”. I would leave this as checked so that all fields are separate.
Next look for a field labeled “Full bank statement” — this is where you can enter the name of your business as it shows up on their credit card transactions. It’s preferable to use the legal entity name to avoid confusion, disputes and chargebacks.
Click “Save Changes” and you’re done! Now it’s time to create a test order using the demo credit card numbers.
Testing WooCommerce Store With Test Credit Card
To perform this testing correctly make sure you log out of your WordPress Administrator account. It’s better to keep your admin and your customer demo account separate.
Now it’s time to run a test on your store using the demo credit cards from Stripe. Your store link should be in a format such as https://YourWebsiteName.com/shop/. Go to the link and click on one of the items to add to your shopping cart. Once you’ve added the item then click on “Checkout”. This will take you to a Register and/or Login page depending on how your store is built.
Once you’re on the checkout page then fill out your information and this time you can use the credit card information that’s found on the stripe website at https://stripe.com/docs/testing?numbers-or-method-or-token=card-numbers. Scroll down to the section title “Cards by brand” and it’ll display different types of credit card and even an international link for international cards.
Enter this credit card information and then finish paying for your item. If everything is configured correctly then it should successfully allow the test purchase to go through.
If you experience issues setting it up then consider contacting your webmaster or WebsiteDesignHouston.net team.
Success!
If you’re order goes through then make sure to verify that its displaying in the WordPress Dashboard –> WooCommerce –> Orders page. It should be in the processing stage until you mark it as complete.
Using SSL to Secure Your Store
SSL is known as a Secure Socket Layer. Basically an SSL allows your website to communicate with your server securely so that the credit card information stays safe. You can speak with your webmaster or your hosting company about installing an SSL for your website.
Time To Go Live
Once you’ve finished your website then you can return to Dashboard –> WooCommerce –> Settings –> Payments –> “Stripe – Credit card”. Click on the “Manage” where you’ll be able to uncheck the box for “Enable Test Mode”. This will mean the Stripe Plugin is now in LIVE mode. You can make a real live purchase with one of the products in your store and verify that the amount correctly shows up in your Stripe account and in the WordPress WooCommerce Dashboard area.
FAQs
How much does WooCommerce cost?
WooCommerce is a free WordPress plugin. There are WooCommerce extensions which enhance the functionality of WooCommerce. WooCommerce extensions vary from free, paid to subscription based.
How many Stripe accounts can I have?
Stripe allows you to setup multiple account under your one email address. This allows you to easily manage different businesses, their legal information and api for each of those different businesses.
Is Stripe the only payment method that’s accepted by WooCommerce?
No, There are dozens of payment methods that you can find on the WooCommerce website under the Extensions page.
Did I miss anything?
Do you have any questions?
Just message me or comment below!